Nginx Installation and Deployment
February 28, 2023 · 4 min read
If you have any questions, feel free to comment below. Click the block can copy the code.
And if you think it's helpful to you, just click on the ads which can support this site. Thanks!
Virtual machine: VMware Workstation 16 Operating system: CentOS 7.4 Download URL: https://vault.centos.org/centos/7.4.1708/isos/x86_64/CentOS-7-x86_64-Minimal-1708.iso[1]
Recommended computer configuration:
- Memory: 8 GB or more is recommended
- Disk: An SSD is recommended
- CPU: Any mainstream CPU with four or more cores will suffice
Installing CentOS 7.4 in a Virtual Machine #
1 Create a new virtual machine
2 Select the typical installation
3 Select the CentOS image
4 Choose the storage location
5 Configure the virtual machine disk: Note that this only allocates the maximum disk size. It will not actually occupy that much space at the beginning; it is a dynamic area that is gradually allocated during actual use.
6 Customize other settings: The defaults are sufficient.
7 Install the operating system
The defaults are sufficient. When selecting partitions, remember to open the settings and confirm them.
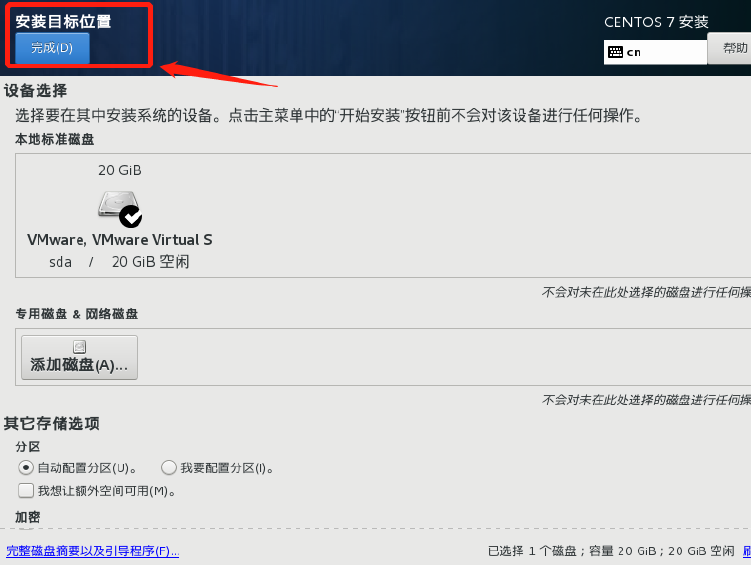
Continue with the installation. You can set the root password during the installation process. Restart after the installation is complete.
Linux Configuration #
Configuring Internet Access #
Edit the network interface configuration file (all settings in Linux are implemented by modifying configuration files).
vi /etc/sysconfig/network-scripts/ifcfg-ens33
Simply change ONBOOT to yes, which causes the network interface to restart when the operating system restarts.
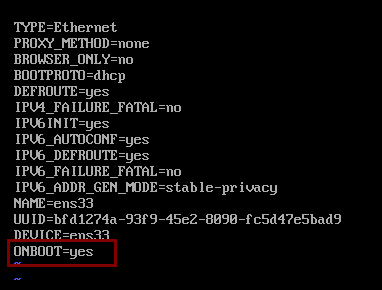
Then restart the network service.
systemctl restart network
Test with ping again, and you will find that the network is working properly.
You can use ip addr to check the current IP address.
Generally, to make it easier to connect to the server and use features such as copying and pasting, XShell is commonly used as the terminal. Download URL: https://www.xshell.com/zh/free-for-home-school/[2]
Configuring a Static IP #
The previous network configuration used DHCP to assign an IP address. This method assigns an IP address for us to use each time the system connects to the network. The IP will change the next time the system starts, making it inconvenient to manage.
To configure a static IP, first open the network interface configuration file.
vi /etc/sysconfig/network-scripts/ifcfg-ens33
Change the boot protocol to BOOTPROTO=static.
Manually configure the IP address.
IPADDR=192.168.44.101
NETMASK=255.255.255.0
GATEWAY=192.168.44.1
DNS1=8.8.8.8
Some common public DNS servers:
Alibaba
223.5.5.5
223.6.6.6
Tencent
119.29.29.29
182.254.118.118
Baidu
180.76.76.76114DNS
114.114.114.114 114.114.115.1158.8.8.8 8.8.4.4
Note that this is strictly case-sensitive.
Example:
TYPE=Ethernet
PROXY_METHOD=none
BROWSER_ONLY=no
BOOTPROTO=static
DEFROUTE=yes
IPV4_FAILURE_FATAL=no
IPV6INIT=yes
IPV6_AUTOCONF=yes
IPV6_DEFROUTE=yes
IPV6_FAILURE_FATAL=no
IPV6_ADDR_GEN_MODE=stable-privacy
NAME=ens33
UUID=10ac735e-0b8f-4b19-9747-ff28b58a1547
DEVICE=ens33
ONBOOT=yes
IPADDR=192.168.44.101
NETMASK=255.255.255.0
GATEWAY=192.168.44.1
DNS1=8.8.8.8
Then simply restart the network service.
systemctl restart network
When I configured this for the first time, the network still could not connect. I changed the gateway here to match the virtual machine’s gateway.
How to find the virtual machine gateway:
Edit ---> Virtual Network Editor ---> Select VMnet8 ---> NAT Settings ---> Gateway IPThen change the
GATEWAYabove to your gateway IP. You should then be able to ping successfully. This is for reference only.
Installing Nginx #
Version Differences #
The commonly used versions are divided into four major groups.
Nginx open-source edition: A very straightforward reverse proxy and load balancer. http://nginx.org/[3]
Nginx Plus commercial edition https://www.nginx.com[4]
OpenResty: Nginx extended with Lua scripts http://openresty.org/cn/[5]
Tengine: Nginx extended in C http://tengine.taobao.org/[6]
Backup and Cloning #
Before installation, it is best to create a clone as a backup in case an installation error makes recovery difficult.
First, you can shut down the virtual machine with init 0.
Then right-click the virtual machine, select Manage —> Clone, and choose to create a linked clone. This cloning method makes it possible to compare the differences between the two.
Installation #
Compiling and Installing #
First, transfer the Nginx installation package, then run tar zxvf nginx-1.21.6.tar.gz. Enter the extracted folder and run ./configure to install it. Errors will occur because the relevant dependencies are missing. You only need to install them according to the corresponding error messages.
./configure --prefix=/usr/local/nginx # Set the prefix and install in the specified directory
make
make install
Resolving Errors #
Prompt:
checking for OS

Linux 3.10.0-693.el7.x86_64 x86_64
checking for C compiler ... not found
./configure: error: C compiler cc is not found
Install GCC.
yum install -y gcc
Prompt:
./configure: error: the HTTP rewrite module requires the PCRE library.
You can either disable the module by using --without-http_rewrite_module
option, or install the PCRE library into the system, or build the PCRE library
statically from the source with nginx by using --with-pcre=<path> option.
Install the Perl library.
yum install -y pcre pcre-devel
Prompt:
./configure: error: the HTTP gzip module requires the zlib library.
You can either disable the module by using --without-http_gzip_module
option, or install the zlib library into the system, or build the zlib library
statically from the source with nginx by using --with-zlib=<path> option.
Install the zlib library.
yum install -y zlib zlib-devel
Starting Nginx #
To start it manually, enter the installation directory /usr/local/nginx/sbin.
./nginx # Start
./nginx -s stop # Stop immediately
./nginx -s quit # Finish accepted connection requests before exiting
./nginx -s reload # Reload the configuration
Firewall #
Stop the firewall.
systemctl stop firewalld.service
Prevent the firewall from starting at boot.
systemctl disable firewalld.service
Allow the port.
firewall-cmd --zone=public --add-port=80/tcp --permanent
Restart the firewall.
firewall-cmd --reload
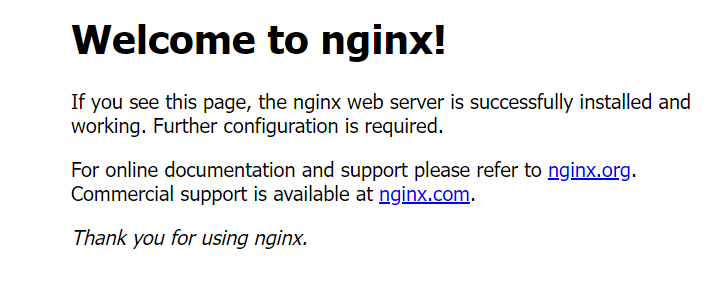
After stopping the firewall and starting the service, you can visit the IP address in a browser to verify whether the service has started. If successful, it will appear as follows:
Installing It as a System Service #
Starting the service manually each time is too complicated, so you can consider installing it as a system-level service.
Create the service script.
vi /usr/lib/systemd/system/nginx.service
Service script contents:
[Unit]
Description=nginx - web server
After=network.target remote-fs.target nss-lookup.target
[Service]
Type=forking
PIDFile=/usr/local/nginx/logs/nginx.pid
ExecStartPre=/usr/local/nginx/sbin/nginx -t -c /usr/local/nginx/conf/nginx.conf
ExecStart=/usr/local/nginx/sbin/nginx -c /usr/local/nginx/conf/nginx.conf
ExecReload=/usr/local/nginx/sbin/nginx -s reload
ExecStop=/usr/local/nginx/sbin/nginx -s stop
ExecQuit=/usr/local/nginx/sbin/nginx -s quit
PrivateTmp=true
[Install]
WantedBy=multi-user.target
Reload the system services.
systemctl daemon-reload
Start the service.
systemctl start nginx.service
Check the service status (whether it has started).
systemctl status nginx.service
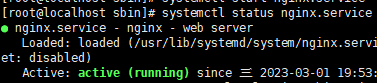
You can see that the service is active.
Start at boot.
systemctl enable nginx.service
References
If you want to follow my updates, or have a coffee chat with me, feel free to connect with me: